
Description: HTC One V USB Driver Latest Free Download
Supported OS: Windows XP, 7 And Windows 8
HTC One V USB Driver Free Download
 HTC One XL connectivity USB driver latest version free download for all windows. USB driver is most important thing that connects HTC One XL mobile devices with PC and laptops Via comfortable USB cable. Just try to get a latest version of USB driver of HTC One XL and install it on your computer windows operating sytstem. After installation of USB driver, connect your device and start you work. USB driver is one of the free software that helps you to connect mobile devices through computers. Just download a USB driver and install it. USB driver also installs your mobile needed drivers in your windows operating system and connect your mobile phone. You can download latest version of HTC One XL USB driver from here easily.
 |
| Raspbian auf dem Banana Pi |


 Samsung GT-S7262 latest connectivity free USB cable driver download link is available here to download. If your Samsung GT-S7262 doesn't connect and showing problems. Then first of all, you have to download latest USB driver for your windows operating system. USB driver driver is absolutely free thing that connects all mobile devices through PC and laptops. Just download USB driver of Samsung GT-S7262 and install it on your computer windows operating system. Then connect your device with a comfortable USB cable with PC or laptop. This version of USB driver is latest and supported on windows xp, 7 and windows 8. File is in small MB size and downloadable in few seconds. Just click on the link and start your download now.
 HTC One X connectivity USB driver latest and recently updated free download from here. If your phone doesn't connect to the pc and laptops and you would like to download USB driver. Then you are coming in best place and you can download USB driver of HTC One X for all windows versions from here provided download link. This version of USB driver is latest and supported on windows xp, 7 and windows 8. Just download USB driver from here and install it on your computers windows operating system. After completion of installation USB driver, connect your HTC One X with a comfortable USB cable and start to do your work. USB driver is absolutely free available to download. Just click on download link and start your download quickly.
 PTV Sports, the best and one of the popular sports channel is now running on biss key/code. This channel is started and launched in Pakistan since 14th January 2012. Its test transmissions had started on Asia Sat in 2011 and now it is available on PakSat 1R 38 Degree. If you want to get and latest and current biss key of PTV Sports. Then, here we provide latest and daily updated biss key of PTV Sports after changed. PTV Sports changes it's biss key during a popular matches also in world cup or other tournament cricket matches. After changing biss key. PTV Sports biss key is always updated and latest available in here. Just get a new biss key of PTV Sports and enter it on your receiver code place and run your channel. PTV Sports today biss key is available in here.


 HTC one M7 latest and updated version USB connectivity driver free download link is completely free available to download. If any one wanted to connect your HTC mobile one M7 with PC and laptops. USB driver is most important instrument that connects mobile devices through computers. Here, we provide latest and updated version of USB driver of HTC one M7 is clearly free available here to download. Just download USB driver and install it then connect your one M7 with a comfortable USB cable with PC. USB driver is in small file size and downloadable in few seconds. Original download link is available below to download and very easy. Just one click on your download link location and start your download. This version is latest and updated and supported on windows xp, 7 and windows 8 (32-bit or 64-bit).
 Nokia 6070 mobiles phones USB connectivity driver free download link is completely free available here to download. If your phone doesn't connect and occuring problems during connection. Then first of all, you have to download USB driver of Nokia 6070 updated for your computer windows operating systems. Download USB driver from here and just install it on your pc windows. After installation, connect your device Nokia 6070 with a comfortable USB cable to the computer. Here, you cab download USB driver of Nokia 6070 for absolutely and completely free. Just follow provided download links and click to start your download. USB driver is latest and supported on all windows versions xp, 7 and windows 8 (32-bit 0r 64-bit).
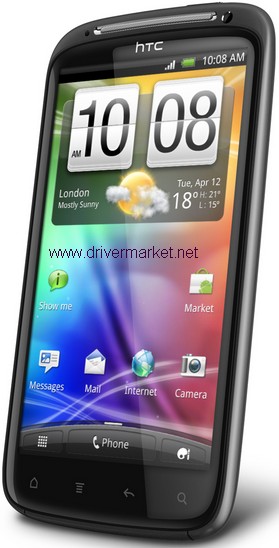 HTC Sensation latest and updated USB connectivity needed driver free download from here. You can now download USB driver of HTC Sensation for completely free from this page. This version of Sensation USB connectivity driver is recently released and available here to clearly free. Download this driver for your pc windows operating system and install it. This version is updated and supported on all windows xp, 7 and 8 (32-bit or 64-bit). So, follow below provided simple steps to how to use this driver and connect your device HTC Sensation to the computer.
 Asus motherboard audio soundcard driver free download now for windows xp, 7 and windows 8. If your pc or laptops sound system doesn't work. Then you have to must download audio driver for asus computer systems. Asus motherboard audio sound system driver is updated and latest and supported on all windows versions. This version of driver is latest and supported on all windows operating systems. Just download this driver and update your asus soundcard system driver for hd sound system. This driver helps you to provide your asus sound and in high quality. This driver is absolutely free available here to download. Follow provided download links and start your download quickly.


 Voice V30 latest version USB driver download link is available here to free download for all windows versions. If your device doesn't connect with pc and laptops via USB cable connection. Then first of all, you have to download USB driver latest version for your computer windows operating system. USB driver of Voice V30 latest version download link is available below posts here for absolutely free download. File of USB driver updated and working fastly then old version of USB drivers. USB driver is most important thing that installs your device needed drivers in your windows and make your connection as fully properly working. Just download a USB driver of Voice V30 mobiles for pc and laptops operating system and then install it. After finishing of USB driver installation, connect your Voice V30 via comfortable USB cable and start your work.
  Samsung mobiles all models USB connectivity driver is free available here to download. USB driver is most important instrument that connects your Samsung mobile phones with pc and laptops via USB cable connection. Here we provide latest and updated drivers for free to download. USB driver get to connect your mobile phone through pc and laptops to access internet. If your want to connect your device and access internet through your pc and lapotps. Then first your Samsung device needed a USB driver and you have to download USB driver for your windows operating system of your computer. Just download USB driver and install it on your pc and laptops operating system. Then connect your smartphone via USB cable to the pc. USB driver is completely free available here to download. Easy download link location and file is in small sizes so downloadable in few seconds.


 |
| ETA0U81EWE & EP-TA10EWE |


 HTC desire HD USB connectivity cable driver is now released and ready to free download here. If any wants to download USB driver of HTC desire models HD USB driver, then here we can provided latest and updated version of driver for completely free to download for all windows versions. USB driver is most useful instrument to connect mobile devices through pc and laptops. USB driver is very useful thing and get connect your mobile devices easily with computers. Simple download link is available below posts to download for free. HTC mobiles needed a USB driver to create a connection through pc and laptops. Just download USB driver for HTC desire mobiles and install it on your windows operating system and then connect your device with a comfortable USB cable connection. This version of USB driver is latest and updated and supported on windows xp, 7, 8 and 32-bit and 64-bit versions. Download link is simple and easily provided in below of posts and is in small sizes. Just click and start your download for clearly free.


